Texture Blending(With Godot)
We’re going to start by obtaining two textures that will showcase blending well, one texture will be approximately average height, and the other will have lots of highs and lows.
AmbientCG provides CC-0 textures.
For the first, we have some dirt: https://ambientcg.com/view?id=Ground042 And for the second a brick material: https://ambientcg.com/view?id=Bricks076A
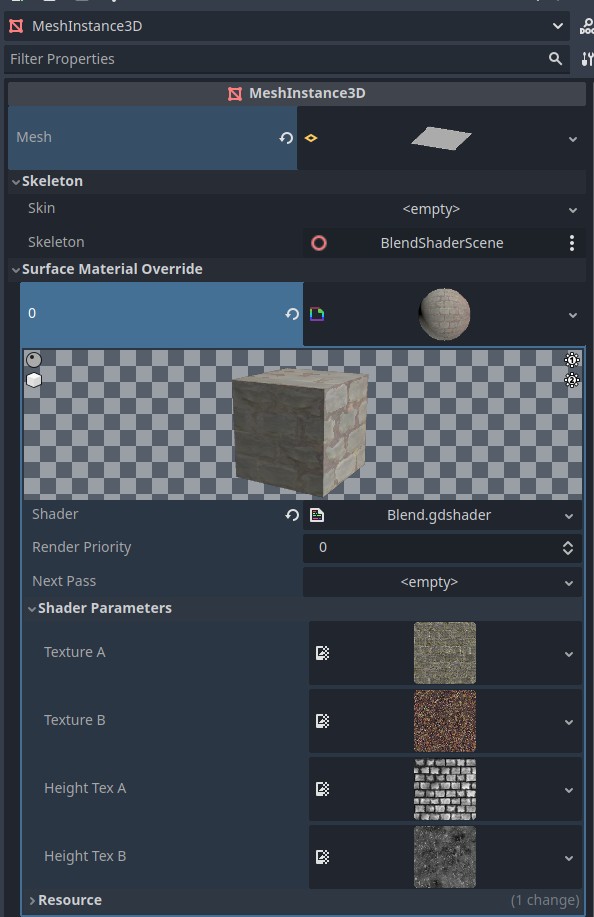
We can start by creating a simple Godot shader to blend between two textures. I’ll be using a Godot primitive plane, and therefore its default UV coordinates will work fine for us. Create a MeshPrimitive node, assign a Plane shape, and set the material override as a new ShaderMaterial. Assign our new shader to that ShaderMaterial.1
shader_type spatial;
uniform sampler2D textureA;
uniform sampler2D textureB;

void fragment() {
	vec4 colorA = texture(textureA, UV);
	vec4 colorB = texture(textureB, UV);
	float blenderFactor = UV.x;

	vec4 blendedColor = mix(colorA, colorB, blenderFactor);

	ALBEDO = blendedColor.rgb;
}
And we’re done! …No? Not good enough? Fine.
What if instead of using a simple mix we used something else to
control the blending?
We can use the height maps of each material to control how they layer over each other like so:
shader_type spatial;
uniform sampler2D textureA;
uniform sampler2D textureB;
uniform sampler2D heightTexA;
uniform sampler2D heightTexB;

void fragment() {
	vec4 colorA = texture(textureA, UV);
	vec4 colorB = texture(textureB, UV);
	float heightA = texture(heightTexA, UV).r;
	float heightB = texture(heightTexB, UV).r;
	float blenderFactor = UV.x;

	vec4 blendedColor = mix(colorA, colorB, blenderFactor);
    // NOTE: this can be converted to a mix + step, as seen later.
	if (heightA >= heightB) {
		ALBEDO = colorA.rgb;
	} else {
		ALBEDO = colorB.rgb;
	}
}
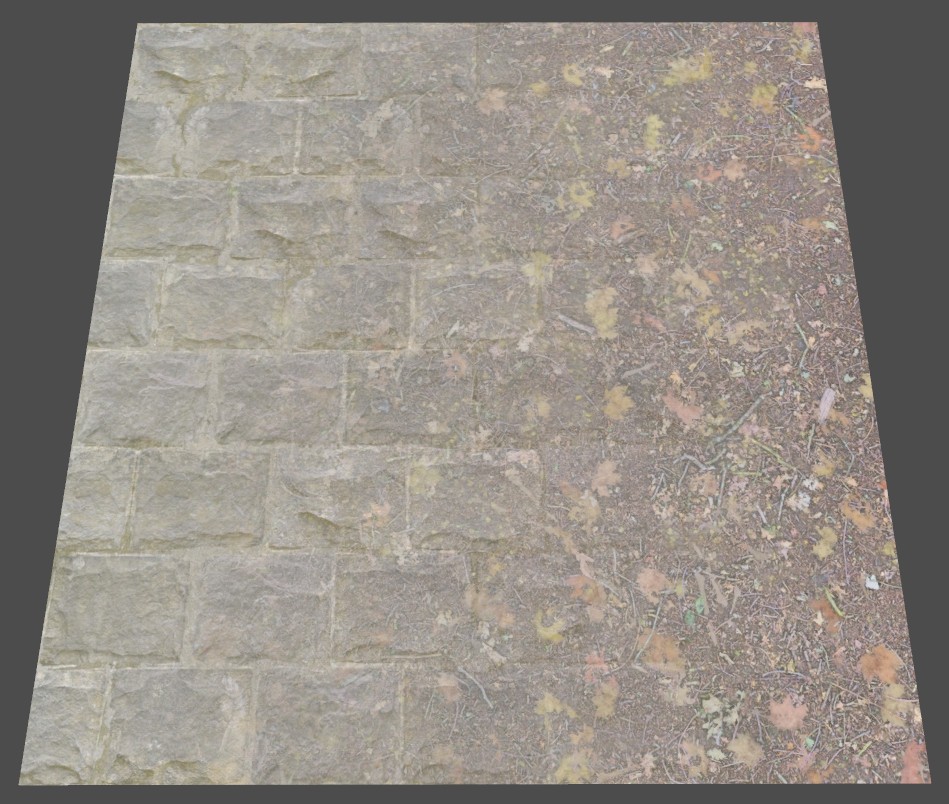
And while that does produce a rather nice-looking result:

It’s not actually what we’re looking for. We can differentiate between the first as blending, and the second as layering. If we wanted to smoothly transition from our dirt to our bricks then, we could use both.
Assume that at UV.x = 0, we just have bricks. And at UV.x = 1, we have dirt. Between this, is our blend.
Therefore, we have three colors. Brick, BrickDirt, Dirt.
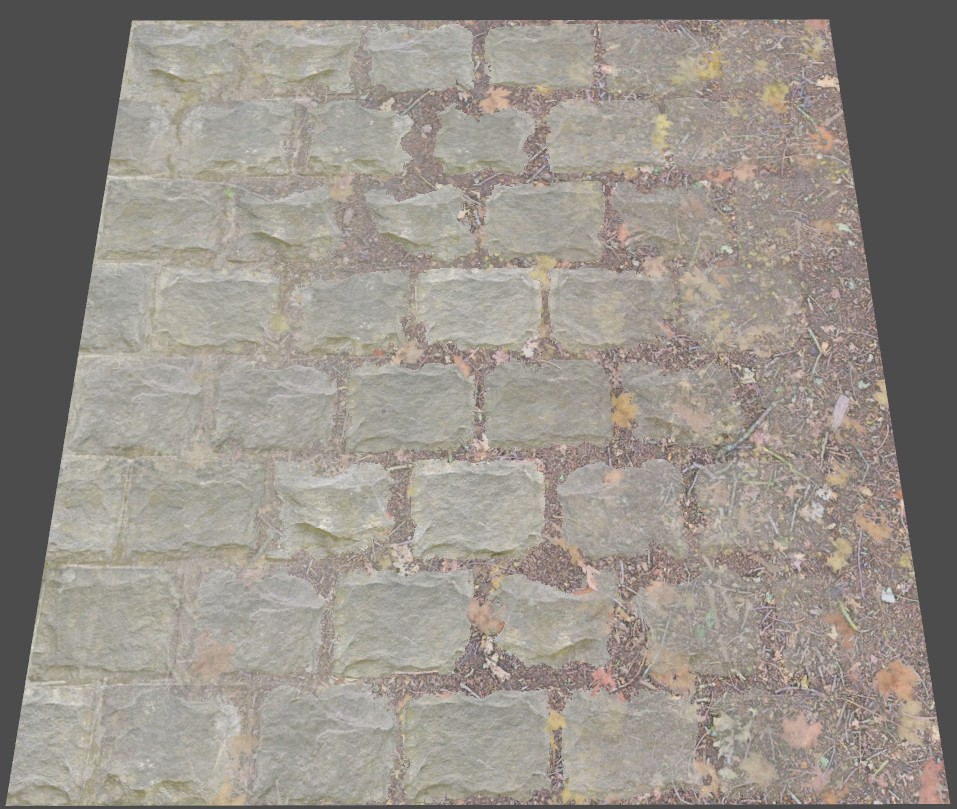
Therefore, for this post, we have our final shader code:
shader_type spatial;
uniform sampler2D textureA;
uniform sampler2D textureB;
uniform sampler2D heightTexA;
uniform sampler2D heightTexB;

vec3 triMix(vec3 colorA, vec3 colorB, vec3 colorC, float t) {
    vec3 mixAB = mix(colorA, colorB, t * 2.0); // Mix between colorA and colorB for t in [0, 0.5]
    vec3 mixBC = mix(colorB, colorC, (t - 0.5) * 2.0); // Mix between colorB and colorC for t in [0.5, 1]

    return mix(mixAB, mixBC, step(0.5, t)); // Blend between mixAB and mixBC at t = 0.5
}


void fragment() {
	vec4 colorA = texture(textureA, UV);
	vec4 colorB = texture(textureB, UV);
	float heightA = texture(heightTexA, UV).r;
	float heightB = texture(heightTexB, UV).r;
	float blendFactor = UV.x;

	// If substitued with step+mix
	vec3 layerColor = mix(colorB.rgb, colorA.rgb, step(heightB, heightA));
	ALBEDO = triMix(colorA.rgb, layerColor, colorB.rgb, blendFactor);
}
The blend itself could be controlled by adding more parameters to the three-way
mix.
We also aren’t limited to mix either. It’s common to use a texture to control
the blending. For example, Valve’s Hammer makes use of a modulation texture.
For my purposes, however, this is exactly what I need, and will expand upon that in a future post.